FIRMWARE UPDATE
We constantly seek out new ways to make your MINOTAIR better!
It really does not matter if you bought your MINOTAIR one, three or five years ago. Thanks to its USB-programmable port, you can rest assured knowing that you will be able to take advantage of new features and enhancements. All our updates are backward compatible with all models. Your MINOTAIR will keep evolving and benefiting you for many years. Besides, it’s complimentary, so why not take advantage of it!
Current Version: 7.9.99 (2024-01-01)
Version 7.9.99 implements the following improvements (download it now):
- Fixes a compilation issue in 7.9.98 (2023-12-29)
- Enhanced compatibility with the MINO-EDH series heaters (Stelpro Heater) reducing the risk of getting a green blinking LED. If green LED continues to blink, the heater control card could be the issue, contact support.
- Improved and revisited calculation of the outdoor temperature. If results remain or become severely off, you might be required to redo the calibaration procedure. It is normal to be within 1-2°C (2-3°F) of the actual temperature.
- Enhanced calculation of the offset when doing the indoor temperature calibration.
- Improved logic for requesting auxiliary heating.
Previous Version: 7.9.98 (2023-11-23)
Version 7.9.98 implements the following new features and improvements :
- Now possible to set a relative humidity limit under which the Minotair will stop the supply of fresh air in order to reduce the risk of over drying the indoor air. This is configurable in the 3rd screen of the Ventilation menu.
- Improved and revisited calculation of the outdoor relative humidity.
- Support for the Mino-Steamer, Minotair’s steam-based humidifier that is controlled via Modbus.
- Improved and revisited calculation of the static pressure, which is now displayed in real time on the main screen underneath the fan icon.
- Improved Free Cooling and Turbo Cooling modes for increased energy efficiency and improved air quality during the cooling season.
- Improved overall system efficiency with the implementation of a 3-hour buffer that keeps track of excess fresh air for later use, thus minimizing the risk of overventilation. Note also that the Minotair went from three 20-minute windows in the hour to two 30-minute windows, also contributing to improved overall efficiency.
- Removed the three Intermittent modes as they can easily (and should be) replaced with the more beneficial Smart mode set to the appropriate fresh air setpoint.
- Added a new “Away” mode, which is basically the Smart mode set for 20 CFM of fresh air. More detail in the latest user guide.
- The maximum fresh air setpoint was reduced from 120 to 100 CFM to reduce the risk of over ventilation.
- Improved and revisited heating and cooling algorithms allowing for better temperature monitoring and control, leading to increased comfort.
- Better decision making when swapping between heating and cooling (and vice versa) when the Minotair is set to temperature automatic mode.
- Improved system safety features aimed towards the compressor and other critical components.
- The Minotair will now warn you when the filters are overdue, reducing the risk of overseeing proper filter replacement.
- Improved overall Modbus implementation.
- Added Modbus variables and integration of the Mino-Steamer (Minotair’s steam-based humidifier).
If you are upgrading from a version earlier than 7.7.9, this upgrade will require that you redo your temperature calibration. If this is not possible due to the outdoor temperature being too close to the indoor temperature (outdoor needs to be at least 10°C colder), you will need to erase the older calibration factors by doing a factory reset (available in the 3rd screen of the Info System menu). Then the word “Calib” will appear in the upper-left corner to remind you to redo the calibration later in the Fall or in the Winter.
How do I tell which firmware version my MINOTAIR is using?
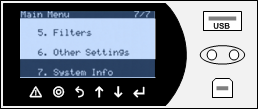
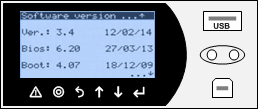
Simply depress the “” key for 2-3 seconds and navigate to the System Info submenu. Then navigate down to the screen called Software Version. The current version used by your MINOTAIR is the one at the top of the list (Version 3.4 in this example).
Do I have to update to the latest version?
No you don’t. If you are happy with your MINOTAIR the way it is, then you absolutely can leave it as is. However, you could be missing out on new features, tweaks and updates that are likely to enrich your MINOTAIR experience. The update process is easy and 100% safe.
Update in 3 easy steps!
- Your USB key must be of a capacity not exceeding 32 GB. A 1 GB USB key is really all you need if you can find one that small nowadays!
- The USB key must not be named MINOTAIR as this will cause a conflict and the update process will not work.
- The USB key must be in a FAT or FAT32 file system format (that’s normally not an issue). To make sure of this, simply right-click on your USB key and select “properties”. You should see FAT or FAT32 next to the File System label. If you see NTFS, then you will need to reformat your USB key with the FAT32 file system. To do so, right-click on your USB key and select “Format”. Then simply select FAT32 and use the quick format option to save time (and, make sure not to name your USB key MINOTAIR!).
- It is recommended to use a blank key, which you might want to dedicate to your MINOTAIR for convenience and to eliminate all risks of incompatibility with files other than the ones required for the update.
- MAC USERS. Mac computers write ghost files on USB keys, which will make the update process fail. To solve this problem, you must install a small software application that will remove these invisible files when ejecting the USB key from your Mac. An example of such application is CleanMyDrive2.
MINOTAIR disclaims all liability concerning the use of third party software applications on your computer.
- Click here to download the latest firmware release. It is in a zip format.
- Save the zip file to your computer.
- Open the zip file by double-clicking on it. It should contain one folder and one file as per the following:
- MINOTAIR
- autorun.txt
- Insert your USB key into your computer.
- Select both the folder and the file in the opened zip file and extract them to the root directory of your USB key. The root directory is the top-most folder in your USB key. In other words, do not extract the two elements into a subfolder or else the update process will not work.
- Your root directory should contain exactly the following folder and files (note that the bios file may not always be present):
GOOD!
|
WRONG!
|
- Open the MINOTAIR main access panel.
- Press any key on the microcontroller to take it out of sleep and to activate the backlit display.
- Turn off the ventilation by pressing on the alarm key “
 ” for 3 seconds (you will hear a series of beeps when doing this).
 - You should take note of the current settings contained in the VENTILATION, TEMPERATURE and HUMIDITY submenus in case you need to re-enter them later.
- Insert the USB key into the upper USB port on the microcontroller.
- Wait a few seconds until the microcontroller asks you to confirm the application upload operation. Press the enter key to confirm.
- Wait 1-2- minutes for the microcontroller to complete the update. While this is happening, there will be several screens appearing. Ignore all of them until you finally see the one asking to cut power to the MINOTAIR.
- Cut power to the MINOTAIR by turning off the circuit breaker feeding the MINOTAIR or by turning off a dedicated switch if exists.
- Remove the USB key from the microcontroller.
- Wait 30 seconds, and reapply power to the MINOTAIR. The MINOTAIR will then start its boot sequence which will last 30-45 seconds.
- Re-enter the settings of the VENTILATION, TEMPERATURE and HUMIDITY submenus as required. You might also need to re-adjust the clock.
- Restart the ventilation by pressing the up arrow key.
- Close the MINOTAIR main access panel.
- That’s it! You now have an updated MINOTAIR.
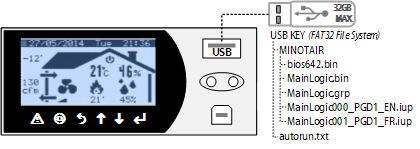
Turn off ventilation and insert USB key.
![]() The following screen should appear within 25 seconds.
The following screen should appear within 25 seconds.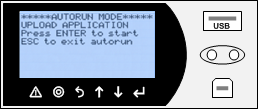
Press the Enter Key “
![]() ” twice to start the update.
” twice to start the update.![]()
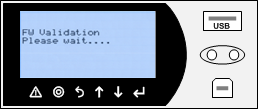
Ignore this screen…
![]()
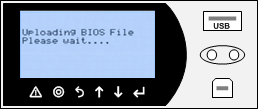
Ignore this screen…
![]()
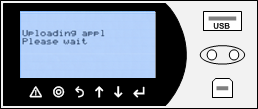
Ignore this screen…
![]()
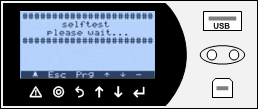
Ignore this screen…
![]()

Ignore this one too!
![]()
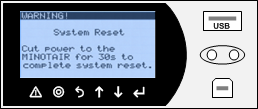
Turn off circuit breaker when asked to cut power.
![]() Wait 30 seconds, remove your USB key and turn circuit breaker back on.
Wait 30 seconds, remove your USB key and turn circuit breaker back on.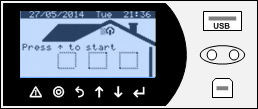
Re-adjust the settings as required, and the clock.
That’s it! Now it’s like having a brand new MINOTAIR! Enjoy!


